Good day everyone! Today we are talking about a very convenient service that I have been using in my work for a long time - Yandex Disk. What kind of "beast" is this? - perhaps, you ask. I will talk about this in detail in the article below. If you have any questions, ask them in the comments, we will understand and look for answers! In the meantime, let's get acquainted with one of the most convenient file storages from the developers of the popular Russian search engine Yandex.
1. Yandex Disk: what is it
Yandex.Disk is a popular cloud storage that allows users to store various information (photos, videos, audio, texts and other files) in the so-called "cloud", i.e. on a server on the network. Data stored on Yandex.Disk can be shared with other users, as well as accessed from various devices– other computers, tablets and smartphones. The basic version of Yandex.Disk is completely free and available to everyone. I remember that in 2012 it was only by invitation, and I used an alternative service - Dropbox. But now I have completely switched to Yandex Disk Cloud. After all, free, and even available from everywhere, 10 GB are not superfluous.
2. Yandex Disk: how to use - step by step instructions
So, I convinced you, and you decided to install Yandex Disk on your computer. Now let's take a closer look at how to use Yandex Cloud (also called Yandex.Disk, since it is a cloud data storage).
2.1. How to create Yandex Disk (registration in Yandex Cloud)
In order to start using Yandex.Disk, you need to register and get a mailbox from Yandex(if you already have it, go straight to the second point).
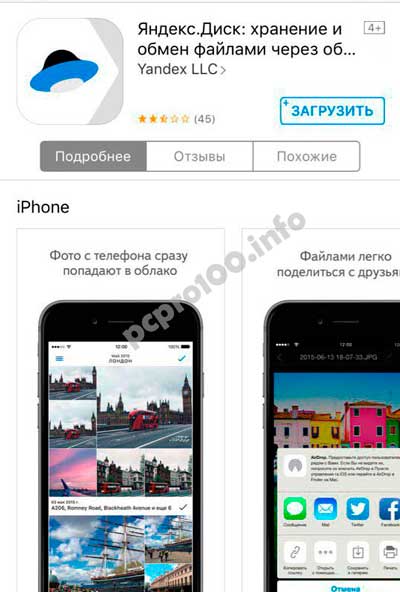
4. Installing Yandex.Disk on a smartphone. Free Apps available for iOS and Android, so they can be downloaded without any problems at App Store And Google Play. The iOS app does not have a very high rating, there are some shortcomings, all this can be seen in the reviews.
2.3. Yandex Disk: how much space is free?
Immediately after registering and installing Yandex.Disk, you have access to 10 free GB space in the Cloud. To begin with, this is quite enough, it was enough for me for about six months. What to do if there is not enough space?
- Additional free 10 GB for inviting friends. You can get 512 MB of free cloud space for every friend you refer. Go here - https://disk.yandex.ru/invites and you will see your referral link, which you need to copy and send to your friends. After each user registers using your link, you will receive additional Disk space, and an invited friend will receive an additional 1 GB.

- Additional up to 250 GB as a gift from Yandex partners. Various promotions are regularly held that will allow you to get additional gigabytes of free space. You can track current promotions on this page.
And of course, as you might expect from Yandex, extra bed can be bought. However, the pleasure is not cheap:
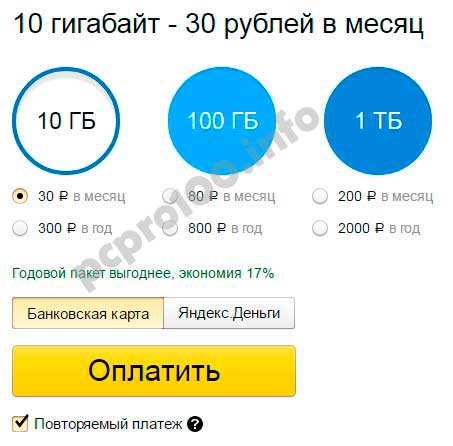
If you need a lot of space in the Cloud, but don't want to pay, you can create several mailboxes and create Yandex.Disk for each of them.
2.3. Login to Yandex Disk
Registration is completed, we figured out the available place, the question arises -?
You can view downloaded files in several ways:
1. Open the Yandex.Disk folder shortcut on the Desktop, if you didn't delete it after installation.
2. Open Yandex.Disk in the My Computer folder.
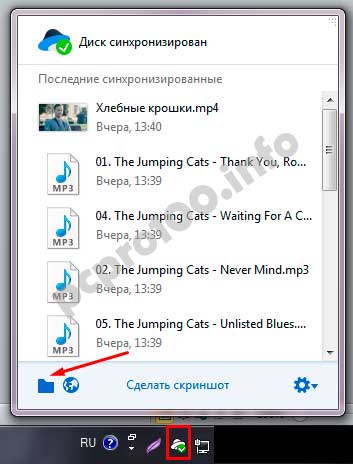
3. Click on the Yandex.Disk icon in the taskbar located in the far right corner of the screen.
4. Enter your mail on Yandex through any browser and at the top there will be a link to the Cloud:
6. Go to home page Yandex, being logged into the mail. In the upper right corner there will be a link to Yandex.Disk:

2.4. How to upload files to Yandex Disk - 7 easy ways
Let us now consider the most important point, because of which we performed all these actions -. Again, there are several ways to do this:
1. Across context menu . Select the file that you want to upload to the Cloud, click on it right click mouse and select the item: "Yandex.Disk: Copy public link":

2. Copy the file to the Yandex.Disk folder(how to enter it, I wrote above). By default, this folder is synchronized automatically, so when copying there, all files will be immediately added to your Drive.
3. Upload files via mobile app iOS or Android. I can consider this method in a separate article, if you leave such a wish in the comments.
4. Upload a file to the Cloud through a browser. To do this, simply drag the selected files with the mouse into the browser window with Yandex.Disk open:

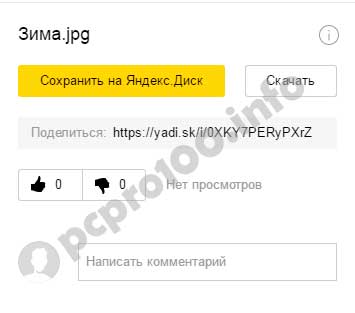
5. Copying someone else's files. If someone shares a link to a file stored on Yandex.Disk with you, you can save it to your Cloud without any problems. To do this, you need to follow the sent link like https://yadi.sk/*** and click on the "Save to Yandex.Disk" button on the right.
They often ask - how to upload a folder to Yandex Disk. The principle is the same as mentioned above in the section with files. But there's another one additional advantage– the folder can be assigned Shared access. Thus, other users to whom you grant access rights will be able to view and download files in this folder, as well as upload their files there.

How to upload a video to Yandex Disk? is also a very popular question from Cloud users. This is due to the fact that video files are usually large, and many people worry that they simply won’t “fit” and cannot be stored there. This is not so, video files, as well as photos, can be uploaded and stored on Yandex.Disk.
2.5. Yandex Disk: how to transfer files to another user

You can also remove access to the file by clicking the mouse and switching it to the OFF position.
If for some reason you need to remove Yandex.Disk from your computer, then you should do the same as with a regular application - use standard tools operating system.
Let's go: Start -> Control Panel -> Programs and Features
In the window that appears, select Yandex.Disk (usually it is the last one in the list) and click the "Delete" button. The downloaded files will remain in your account, only the application will be removed from the computer.

We have covered in detail the process of creating a Drive, creating a folder on your personal computer to transfer files to Yandex.Disk. But there is one BUT. All files that we place in this folder are stored in 2 places: on your computer and on the Yandex Service Cloud. Over time, free space on your computer decreases. Today we will look at how to make a separate folder for Yandex Disk, in which files will be stored only on the Yandex service, without taking up free space on your hard drive. To do this, we will connect Yandex Disk as a network drive. At the same time, you can create new files in this folder, move, delete. In general, everything is like in a regular folder.
So, let's begin. Open Start, right-click on Computer and select "Map Network Drive..."
A new window will open:

Choose a letter for your network drive(1), in the Folder field enter the following address: https://webdav.yandex.ru(2). Put a tick in front of "Restore at login" (3) and click "Finish" (4).

After a few seconds, a new window will open in which we enter our data from Yandex Disk. Attention! Some users simply copy and paste their data. If you paste the copied password here, the message "Access Denied" will appear. That's why the password must be entered manually. Check the "Remember credentials" box and click OK.
If you entered everything correctly, then a network drive folder will open with the contents that are stored in your Yandex Disk.

Now you can add new files to this folder, rename, delete. In this case, all files are stored only on the server, without taking up space on your hard drive.
We hope that this article was useful and interesting for you. You can add your questions in the comments or use the feedback.
Not so long ago, a new experimental version of New Yandex Disk 2.0 was released. . This version will not duplicate files on your computer
Hello dear friends. You probably use Yandex.Disk, or at least heard about it. This popular cloud storage allows you to store files on Yandex servers and share them on the Internet, configure general access and take screenshots. You can also connect Yandex.Disk as a remote drive and work with it on any computer that has Internet access.
About a year ago, I wrote an article about how, where I answered the questions:
— How to register and set up a disk?
- How to install software application on computer?
— How to increase disk space in cloud storage?
— How to create screenshots using Yandex.Disk?
But, along with the general number of questions about setting up Yandex.Disk, I am regularly asked two questions:
- How to connect a disk through?
- How to set a password for Yandex.Disk?
In this article, I will answer the first question. And I will show a universal solution to the second question, which will reliably protect your disk without additional passwords.
Remote connection to Yandex.Disk.
I’ll say right away - connect Yandex.Disk via ftp connection it is forbidden. But this can be done through WebDAV (a set of extensions and additions to the HTTP protocol).
In fact, this is the same thing, for an ordinary user there is no difference, only it is configured a little differently.
The bottom line is that using WebDAV technology, you remotely connect to Yadnex.Disk. Thus, you can create a network drive on your computer and work with it through Explorer or any other file manager. Almost everything is the same as with ftp connection.
In this case, all files will be stored on remote Yandex servers. Only icons will be displayed on your computer for your convenience.
And there is no synchronization with your computer, as is the case with installing the Yandex.Disk application on your computer. That is, the files will be stored only in the cloud.
As an example of creating a network drive, I'll show you how to do it using Windows Explorer and file manager Total Commander.
How to create a network Yandex.Disk in ExplorerWindows?
Adding a new element to network
At this step, you need to enter the server address to connect to:
https://webdav.yandex.ru


Now enter a name for the network drive. You can name it whatever you like. It makes no difference.


You can use this disk like any other disk on your computer. And its contents will be available to everyone who works at the computer. But only if you have an internet connection.
Note: if you want to delete a network drive, just right-click on it and select "Delete".
How to create a network Yandex.Disk in Total Commander?
Unlike the previous method, this one is able to solve both questions voiced at the beginning of the article. That is the question remote connection, and security.
But first you will need to install an additional plugin in Total Commander.
So, to install the plugin, you must first download it. To do this, go to the TC plugins page. Find a plugin webdav and download it to your computer.


Choose a section "Plugins" and press the button "Setting" in subsection "File system plugins (.WFX)»

Next, click on the button "Add"- open the folder with the plugin and select the plugin file, in accordance with the bitness of your operating system. I have a 64-bit system and choose the davplug.wfx64 file.
After selecting the file, press the button "OK". Once again "OK".

That's it, the plugin is installed and everything is ready to connect Yandex.Disk using the WebDAV client.
For this we open "Net" and see the folder there webdav, open it.

You will see the contents of the folder, where you have two options to create a remote connection.
The first option is to make the connection once and use it constantly. But, at the same time, advanced users who know how to use Total Commander will be able to use the contents of the disk.
The second option is to use a quick connection and enter your username and password each time you connect. In this case, if you disconnected from the disk, then its contents can be used only by entering your login and password again.
Option 1.
So, if you want to create a permanent connection according to the first option, then press the key F7 – enter a name for the connection.

Next, fill in the server address (https://webdav.yandex.ru), login and password from mailbox Yandex. And mark the checkboxes as shown in the screenshot. This is quickly done by selecting the Microsoft IIS default settings.

After you press the button "OK", you will have a folder with the contents of Yandex.Disk.

By opening this folder, you connect to Yandex.Disk.
To disconnect from the disk, just press the button "Disable".

If you want to delete this connection, then just select the folder and click F8 .
Option 2.
If you want to use Yandex.Disk on your computer, but are worried that outsiders can access its contents, then a temporary connection is for you.
That is, you connect to the disk, work with it, and when you leave the computer, you disconnect. In this case, reconnection is possible only after setting up a connection where a login and password are needed.
This connection is made in exactly the same way as in the first option, only you do not create a dad with a connection, but open the folder Quick connection. And set up a connection.

And the contents of Yandex.Disk will immediately open in front of you.
And now, to consolidate the material, I propose to watch a video tutorial, where I step by step show and tell the steps described above.
Well, what about friends, I'm sure you found answers to your questions, but if additional ones appear, then I will be happy to help you.
And that's all I have for today. I wish you all good luck and good mood! See you in new videos and articles.
I receive an error message
If you receive an error message when you try to connect using WebDAV protocol, make sure you have entered the correct access settings. Check if the password is correct, the keyboard layout is correct, and if the Caps Lock key is turned on. Also, make sure you have enough free disk space for the copied files. You also cannot upload files larger than 50 GB.
Note. Connection to the WebDAV server occurs only with the help of SSL encryption. If the program you are connecting with does not support SSL, you will not be able to connect to the server.
Invalid folder name. Specify a different name.
This issue occurs because of a problem with Windows itself, which does not support WebDAV over secure HTTPS. We are working on a solution to this problem.
I deleted the files but they are not in the Recycle Bin
When deleting via WebDAV, files do not end up in the Recycle Bin, but are immediately deleted from Yandex servers. If you deleted files via WebDAV, you won't be able to restore them.
Write to support
It is much more convenient to work with cloud storages if you can connect to them via the FTP data transfer protocol. This is a very fast protocol that allows you to transfer files to a server or from a server to a client almost instantly, at least much faster than standard Internet download protocols. In this article, we will analyze whether it is possible to connect your PC via FTP to Yandex Disk, and what alternatives there are, as well as ways to create a network drive on your computer from remote server FTP.
Is it possible to access Yandex Disk using the FTP protocol
During the development of Yandex Disk, programmers for a long time could not decide on the protocol to choose for connecting to the service. After all, it is the protocol that determines the relationship between the server and the client, and the rules by which they will work. So, what functions Yandex Disk will have depended on the choice of protocol.
As a result, the choice was not made in favor of the FTP data transfer protocol. It was dropped as an option, along with other powerful protocols: BitTorrent, Amazon S3, and others. In their article, the programmers wrote that although they respect the FTP protocol as one of the oldest and most time-tested, its shortcomings do not allow using FTP for such a global service as Yandex Disk.
And the thing is that FTP was considered an insecure protocol for such purposes. Yandex Disk is too big a service to leave holes in it that hackers can take advantage of. It is known that the FTP protocol is open, unencrypted from prying eyes, therefore, when intercepting data, clients are easily hacked. In addition, the Yandex Disk developers emphasized that FTP does not support many of the operations necessary for the service to work. In particular, an argument was made about the lack of a file transfer function along with the meta data associated with them. And the last argument against FTP for Yandex Disk is the need to use third-party programs to connect.
The WebDAV protocol was chosen. It is considered a worthy continuation of the FTP data transfer protocol, although it works on the basis of HTTP and XML.
The developers took up this particular protocol, because it can be worked with both using standard operating system tools and using various programs. And thanks to an open license, Yandex programmers adjusted the protocol to fit their needs, adding reporting on actions on the server, which was not there before.
How to connect to the Yandex Disk service through FTP clients
Those who are already upset and folded their hands, due to the fact that it is not possible to connect using the FTP protocol, can get back on their feet - you can use FTP clients to work with Yandex Disk. The bottom line is that clients are multifunctional programs. And, as a rule, they are designed to work not with one FTP protocol, but with many others. But since FTP is a popular protocol, other types of connections are ignored by client users.
Even in popular program to work with FTP - in Total Commander - it is possible to access Yandex Disk through their WebDAV protocol. Only you will have to install a special plug-in in Total Commander that will add this feature to the program. After that you will have new feature, and to activate it, you need to go to the network place and find the WebDAV folder. Inside this folder, you must press the F7 button, which will start the process of creating a new connection.
Next, a window will open where you need to enter your Yandex Disk login information. The server address will be fixed - you need to specify webdav.yandex.ru. Below you will need to specify the login by which you will connect, as well as the password for the account. It is recommended to check the box next to the SSL item - this way you activate data encryption so that no one can intercept your login and password. On this, the connection setup can be completed - you can leave the rest of the options untouched. Press the OK button, connect to the Yandex Disk service - and the file system of this cloud storage. Now you can perform operations in it, as if you were doing it through the standard Windows Explorer.
Is it possible to mount a network drive via FTP on a PC
Still, it is strange that Yandex programmers did not choose FTP Drive as the main protocol. After all this protocol can easily work without special programs, and with the help of standard Windows features. And as for security, there is a special modified SFTP protocol, which is a mixture of FTP and encrypted SSH.
So, to access the server without a special client program, you just need to connect it as a network drive on your computer. That is, you will be able to perform operations on the server, and at this time you will be in the standard Windows Explorer.
Connecting the server as a network drive will not take you much time. First, go to "My Computer". Then move the cursor to a place where there are no items to select and right-click. Select "Add New Item to My Network Places". After that, a special wizard for adding network drives will appear in front of you. Create a new network drive to connect the server to via FTP. Then write down the data for connecting to the server: host name or its IP address. In the next step, uncheck the box next to "Anonymous login" and enter your login information.

At the final stage of adding a new network drive, the system will prompt you to choose a name for the created environment. Write down any convenient name, select a letter for the drive, and click "Finish". The disk will now appear in file system and in the My Computer folder. After you click on it, the server will ask you to enter a password. Next, a server will open in front of you, only it will look like any other drive on your computer - there will be folders and files on it, as if you were not connected to the network. This is the beauty of working via FTP via standard means operating system. It is strange that the programmers did not take into account this possibility and did not trust the Yandex Disk service to the time-tested FTP data transfer protocol.